

Congratulations on purchasing your new Epson ET-3760 printer! This article will answer the question How do I Connect My Epson ET-3760 to my Computer? If you have trouble following this guide or need help, Nerds On Site can help install your printer at your home anywhere in the USA or Canada.
Article Contents
Epson Printer Software
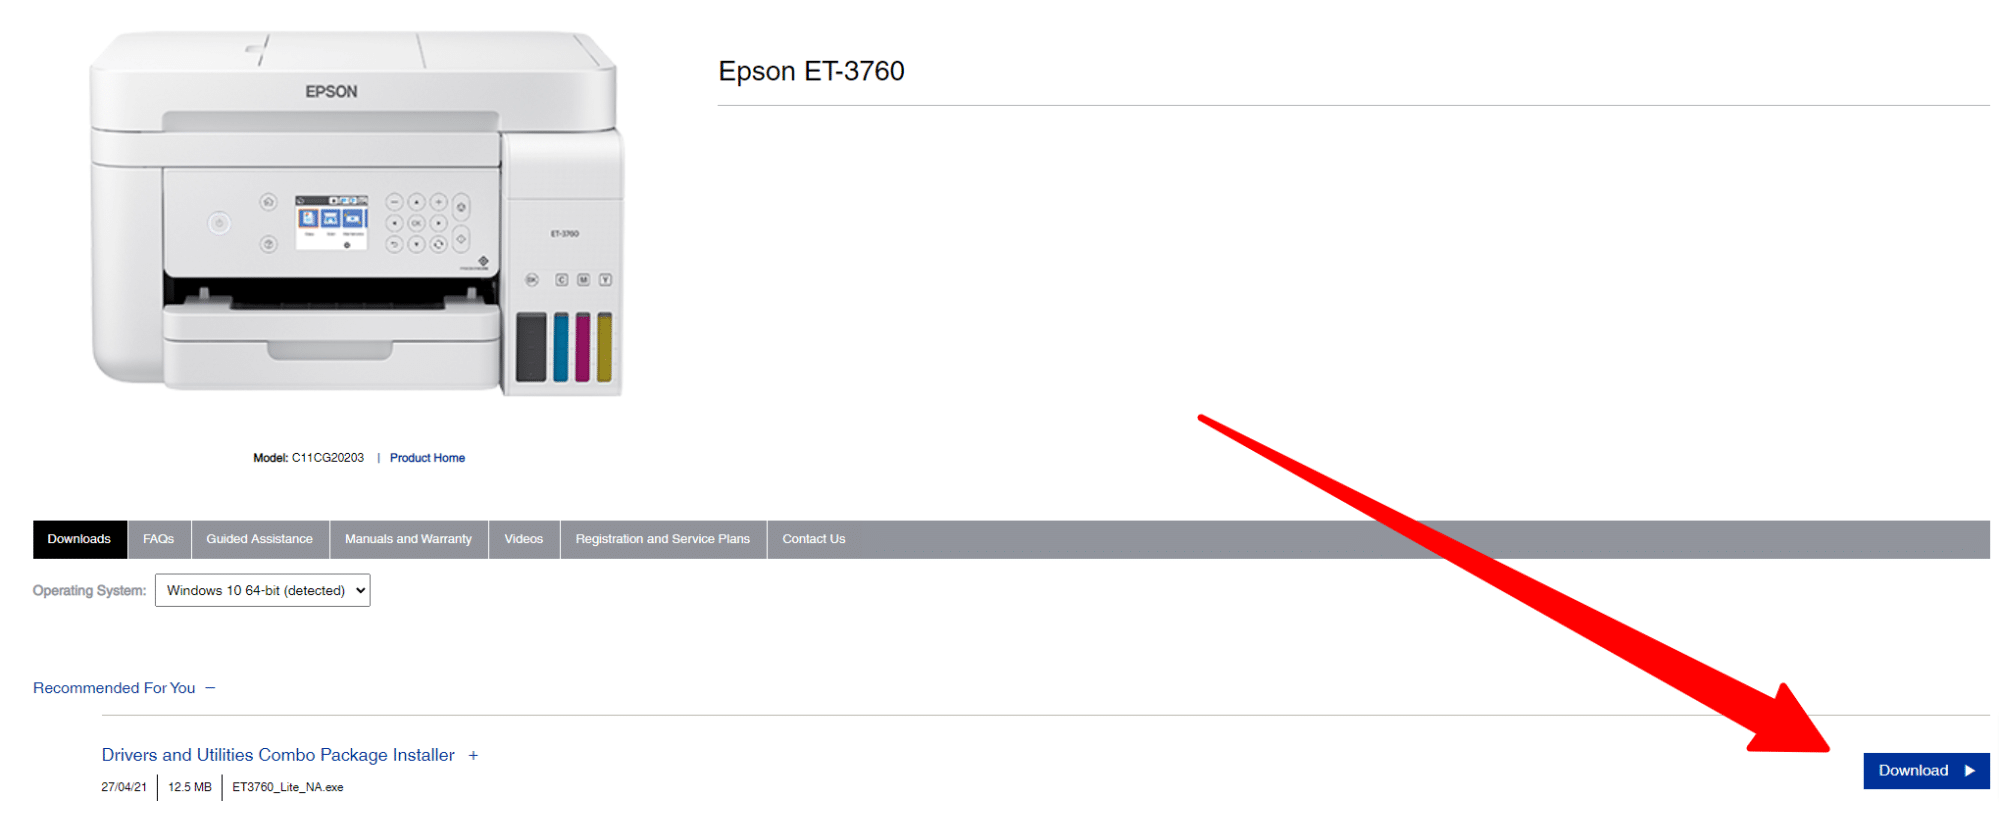
Before you move ahead with our article on setting up your Epson ET-3760, you must download and install the Epson printer software. The software can be found here:
- USA: www.epson.com/support/et3760 Epson ET-3760
- Canada: www.epson.ca/support/et3760 Epson ET-3760
You should see something like this once you’re on the Epson printer software web page. Please click the Download > button in the middle right of the screen.
Once you click Download and open the file, it will advise you that the program has everything you need to use your Epson ET-3760.
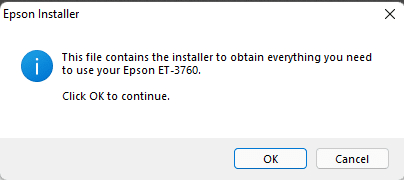
Click OK to continue.
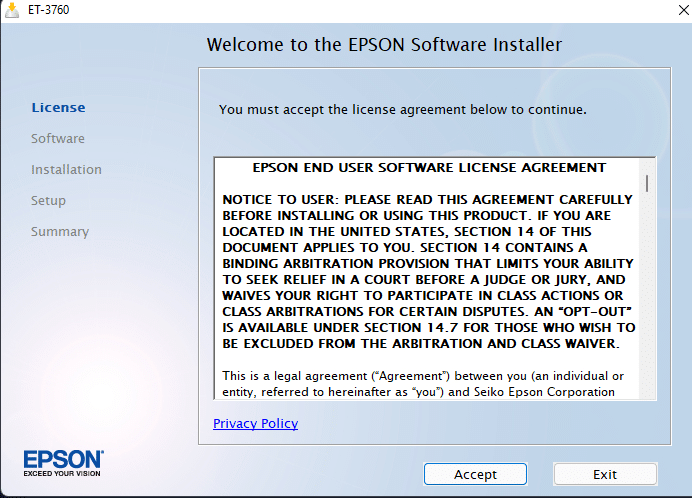
The following window will be your installer opening. Read & accept the license to move onto the setup.
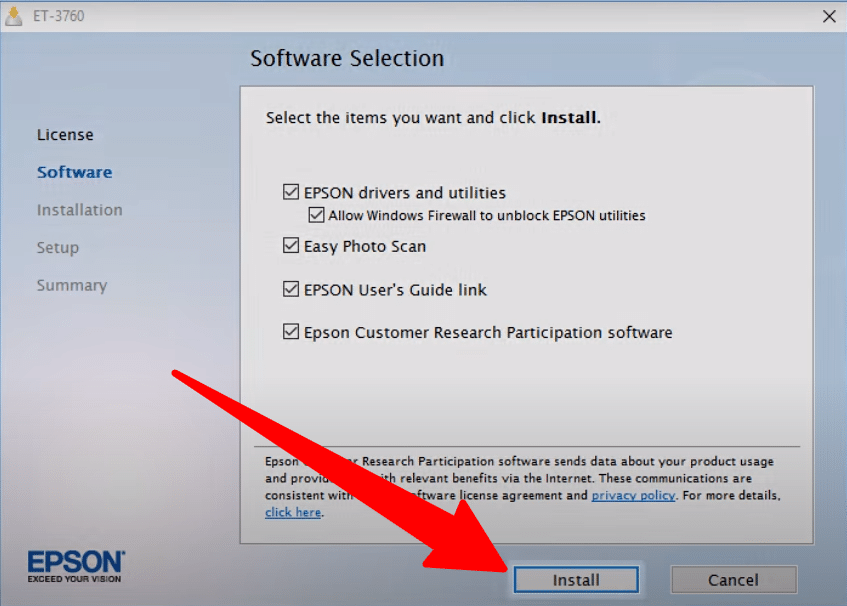
We recommend allowing Epson to install all software suggested, so nothing needs to be changed on this screen. Hit Install. The software will begin installing. This process takes up to 5 minutes.
Do not progress any further before reading below.
How do I Connect My Epson ET-3760 to my Computer?
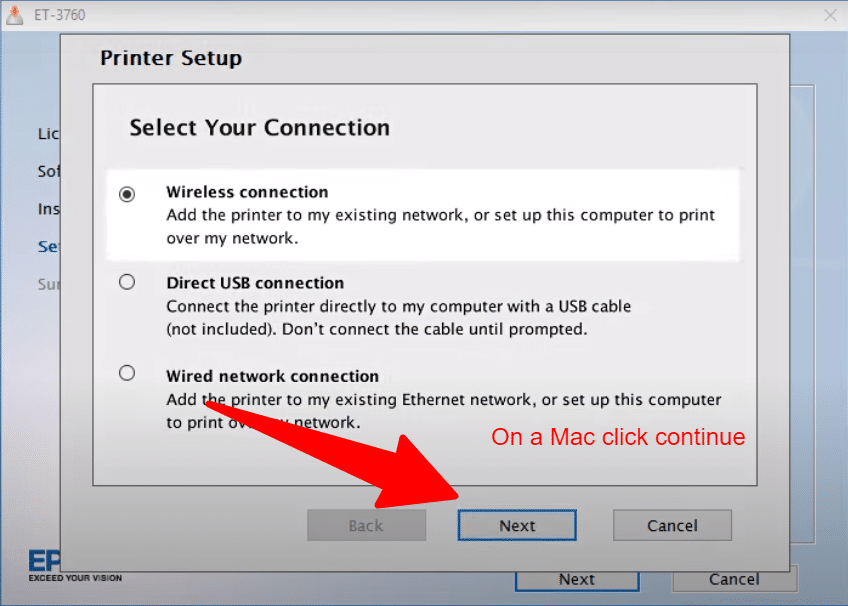
The Epson ET-3760 printer has three connection modes:
- Wireless Connection
- Direct USB Connection
- Wired Network Connection
You first need to decide how to connect your printer to your computer.
A Wireless Connection will allow you to place your printer anywhere.
Proceed to the instructions below.
A Direct USB Connection will need to be near your computer.
Connect your USB cable to the back of the printer and into your computer and follow the setup instructions shown below, but instead of Wireless, choose a USB cable.
A Wired Network Connection will need to be near your router. Click this link if you want to use a Wired Network Connection.
Similarly to above, connect your wired network connection from your router into the back of your printer, and then follow the instructions on your computer, choosing a wired network connection.
Wireless Setup
You’ve decided to install your Epson ET-3760 with a wireless setup, good choice! This will allow you to print from any device anywhere in the home when connected to your wireless network.
If the installer can detect your wireless settings, you will see this screen. Click Next (Or continue on Mac). If you do not see this screen skip the following two images to “Unable to detect wireless settings.”
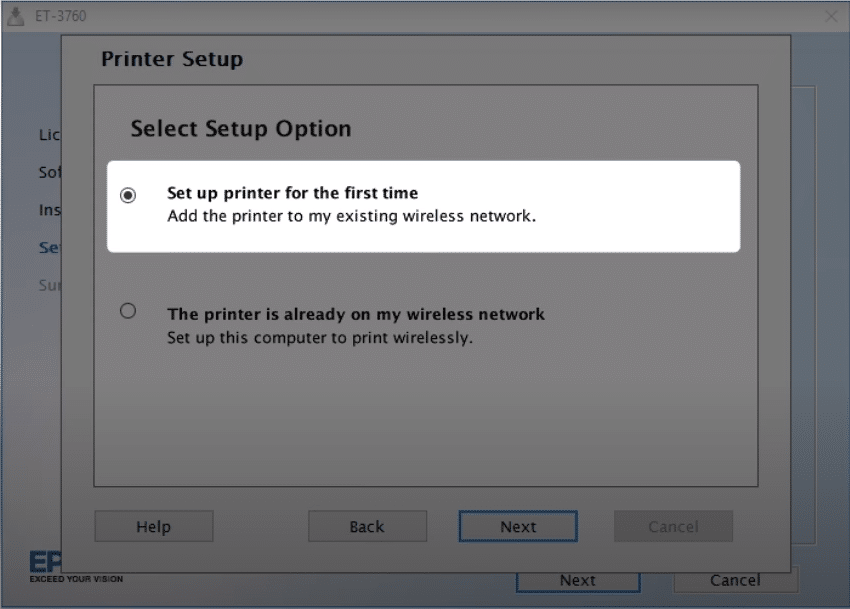
As this is a new printer, leave “Set up printer for the first time” and click next.
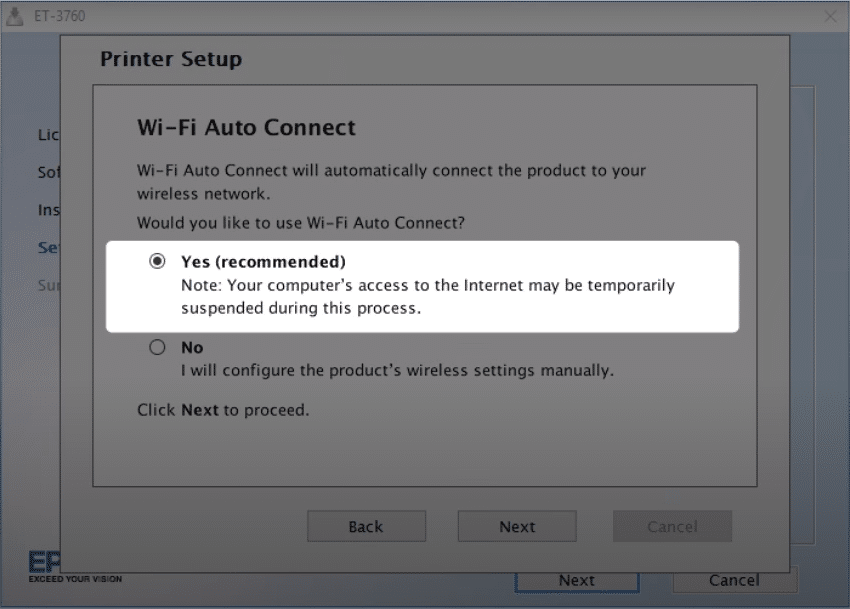
Leave Yes (Recommended) and hit next. After a few moments, your printer should be set up, and you should be able to open the Epson software!
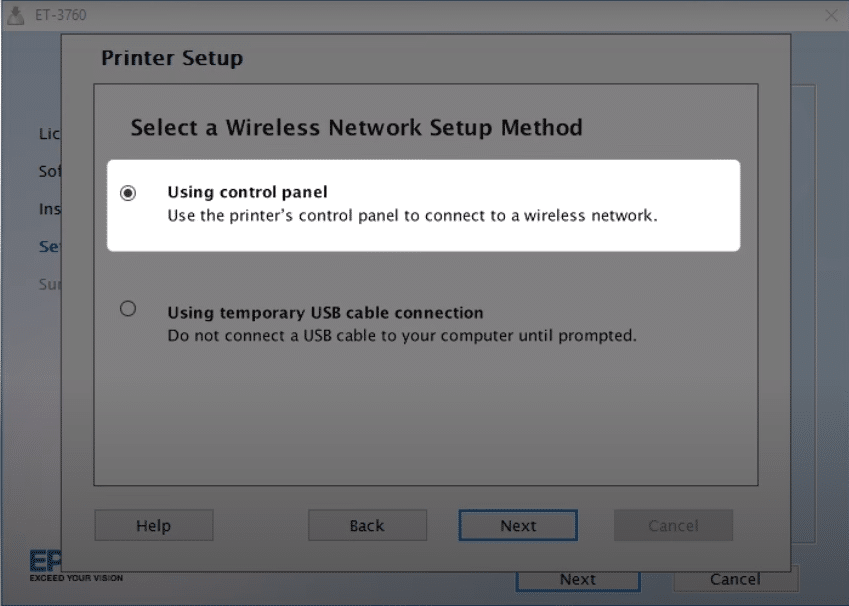
If you see this screen, Epson could not detect your wireless settings, and further action needs to be taken. The following steps will include inputting data onto your printer, so make sure you have a pen and paper handy.
We will write down your wireless network information to manually input it onto the printer. Choose ‘using control panel’ and hit next.
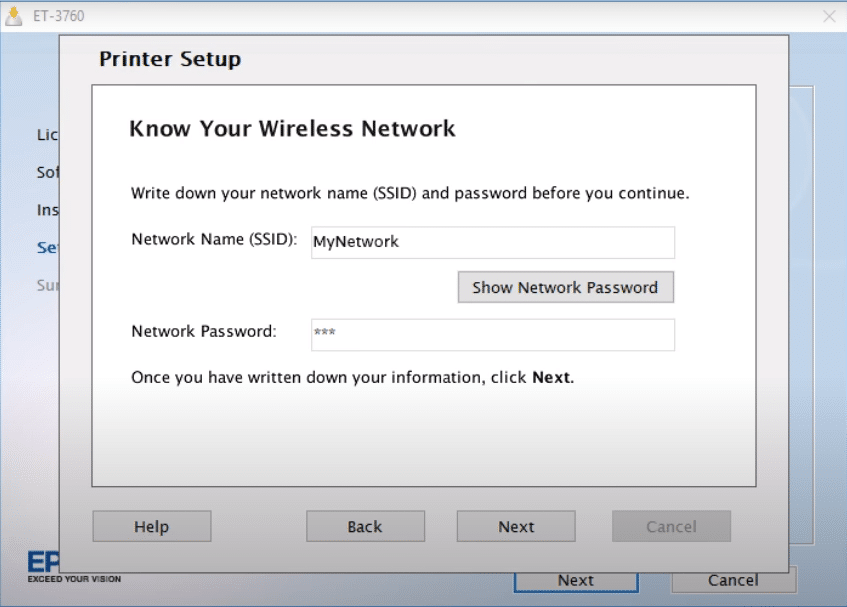
This will show you what network your computer is connected to and the password to the network. Click ‘Show Network Password’ and record network name and password.
The password is case-sensitive. If your password shows ‘Th1sIs4#,’ You need to record the upper case, lower case, numbers, and symbols.
You need to continue the rest of your wireless network setup via the printer control panel.
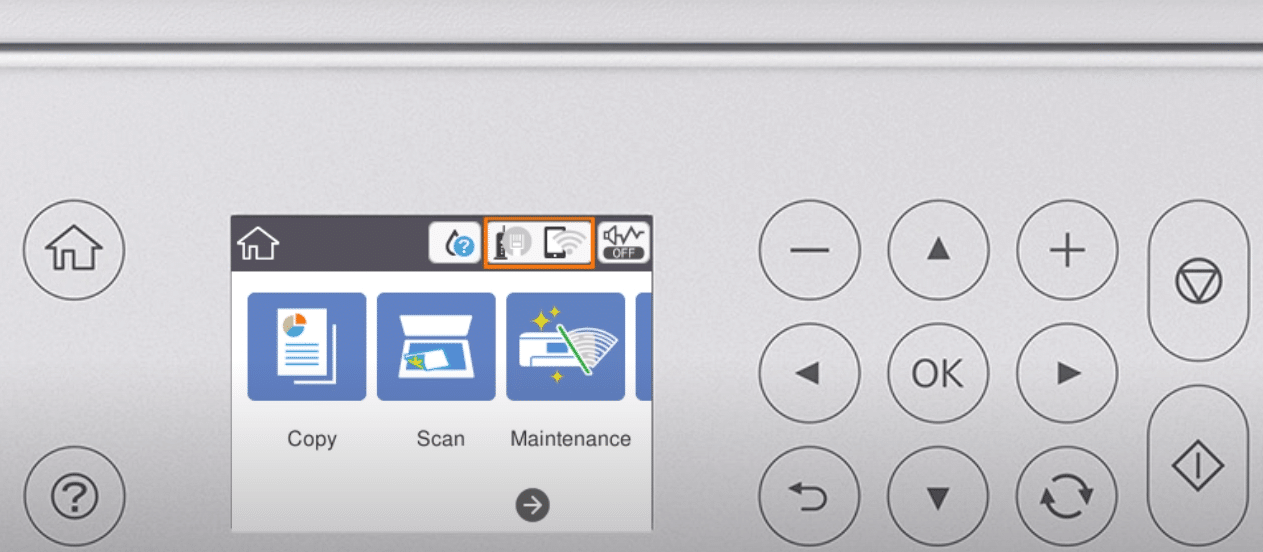
Once you’re in front of your printer, hit the Home button (house left side) > Up (Arrow) > Right (Arrow)
You should now be on the network icon that looks like a cell phone/home phone with a Wi-Fi signal. Hit OK.
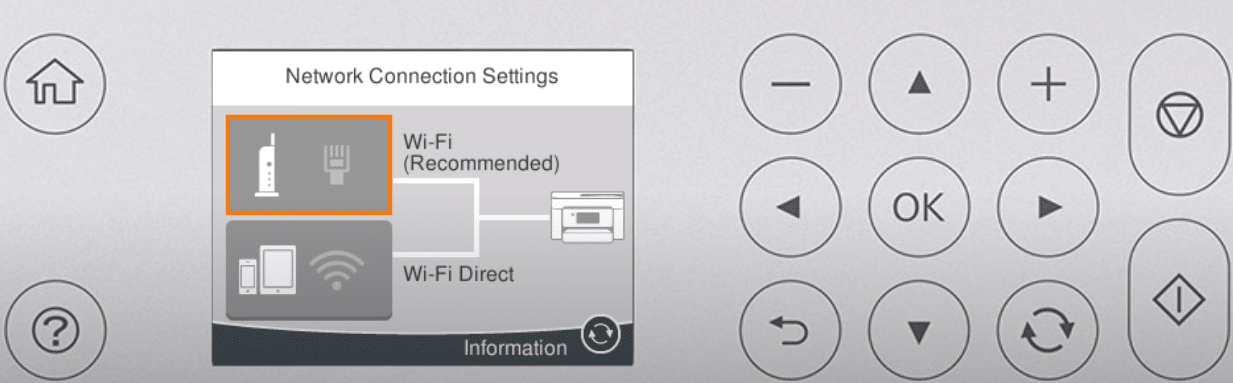
Hit OK on Wi-Fi (Recommended)
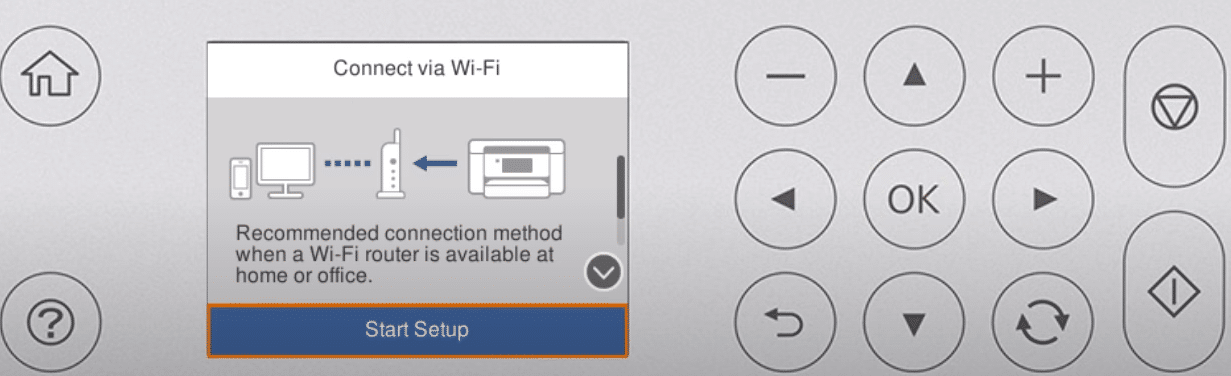
Hit OK on Start Setup
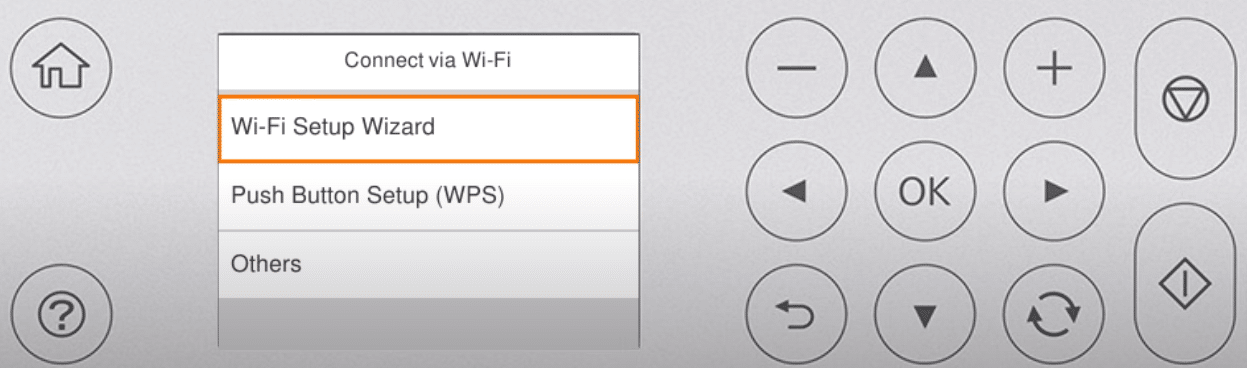
Hit OK on Wi-Fi Setup Wizard
Press the Up or Down keys to find the network information you have previously written down from your computer. This may take a few moments, depending on how many networks are in your area.
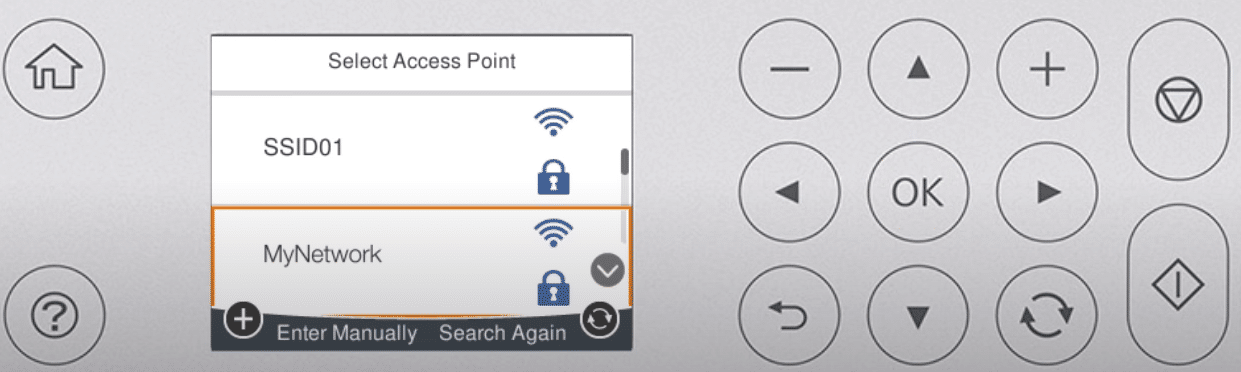
Once you’ve found your network, highlight and hit OK.
Highlight the ‘Enter Password’ box and hit OK.
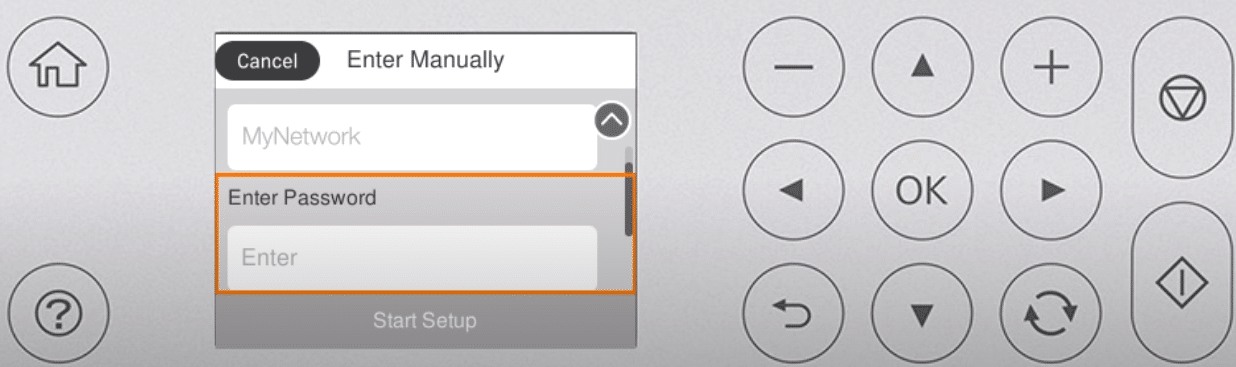
Enter the wireless password you had previously written down. Remember, this is case-sensitive.
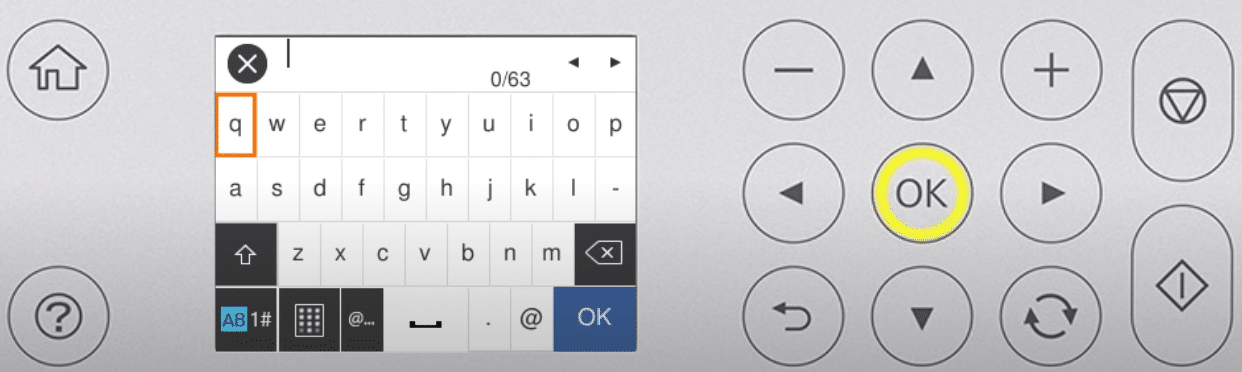
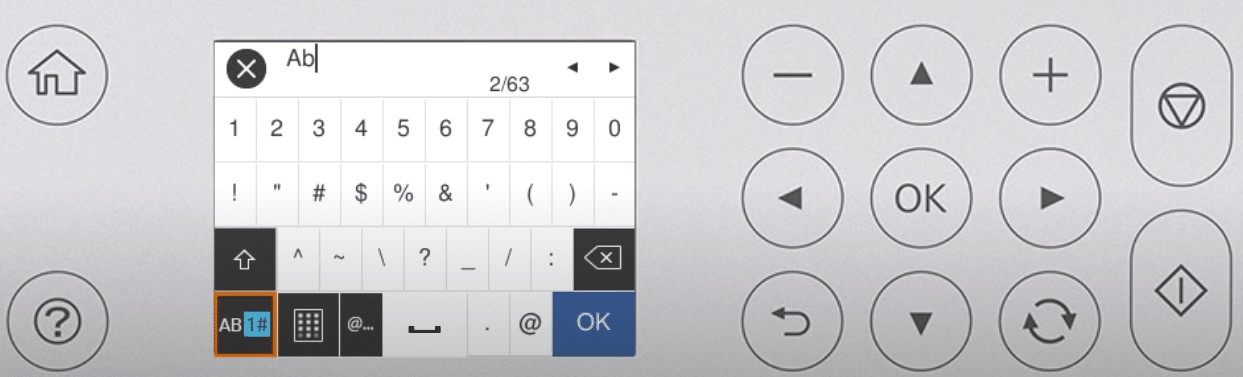
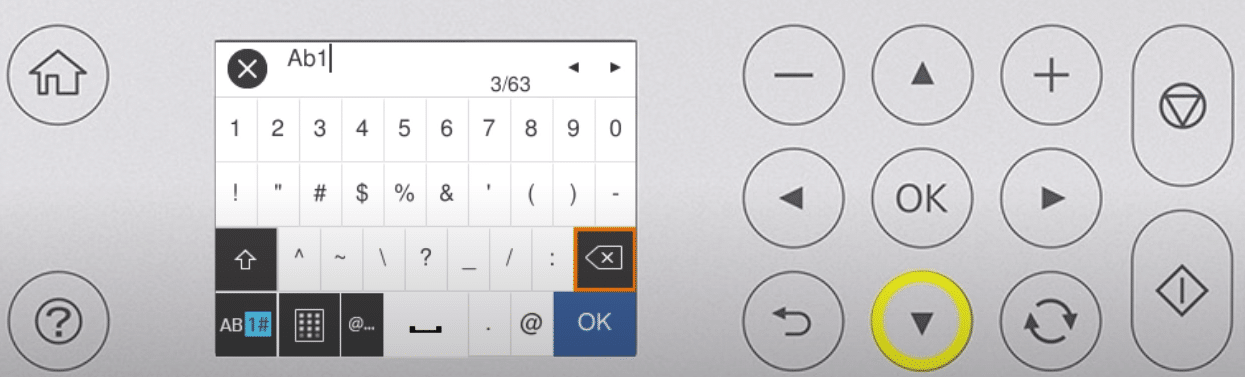
Use the up and down arrows to find the right character, and then hit OK to enter the character.
The below screenshots will show you how to enter upper case and numbers. If you want to go back to the regular screen or case, make sure to deselect that option.
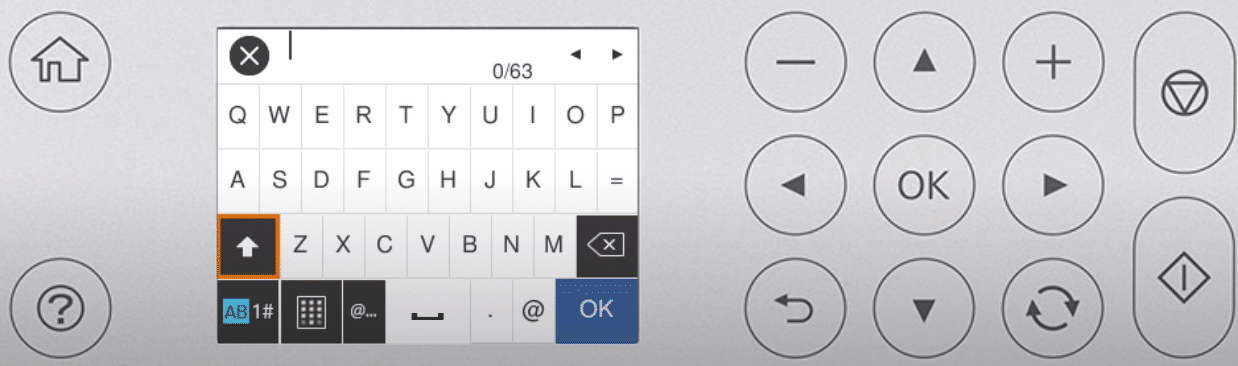
When done, arrow across to the blue OK button and hit OK on the printer.
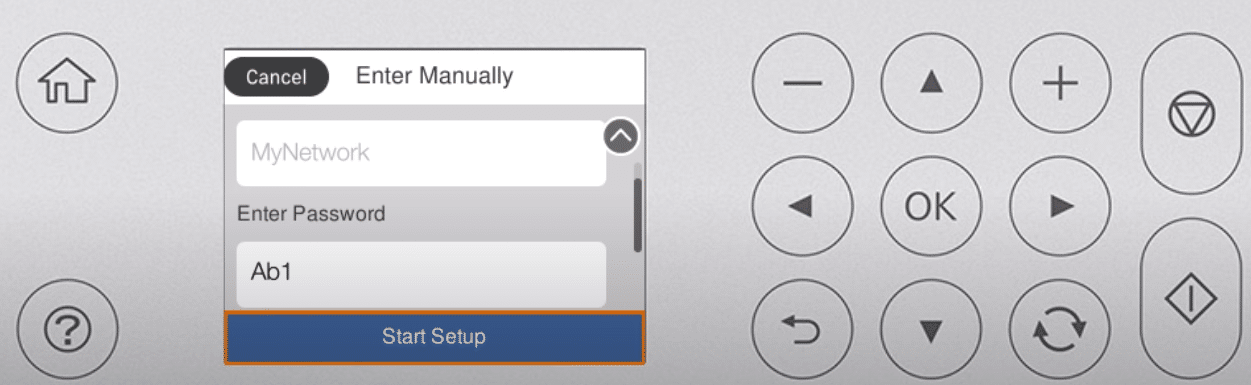
You will be returned to this screen, press the down arrow and hit start setup. > OK
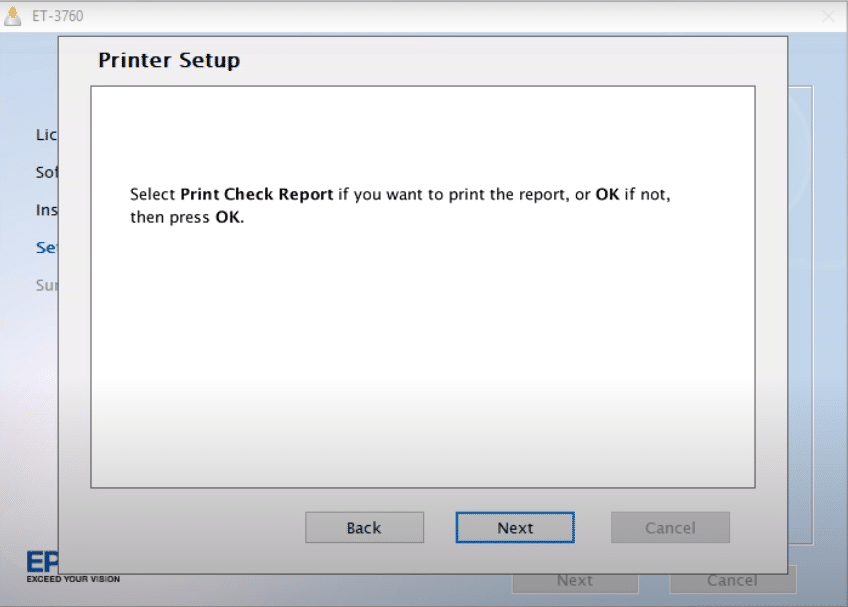
Now you will see the Print Check Report. Hit Next to skip this section, and your wireless printer setup should be completed; you can now continue on your computer and complete the install and are ready to print wirelessly.
Conclusion
Your printer should now be connected and ready to go! If you’re still having trouble, don’t hesitate to contact us, we do on site printer service anywhere in the USA & Canada.